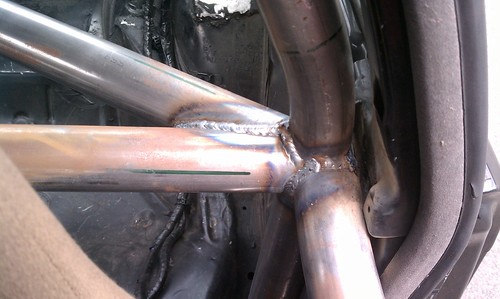
First off...I HATE painting. Especially automotive painting. I just don't have the patience for all the prep work that is involved. With that being said, I dove into painting the new roll cage last night with much excitement.
Since the car was out of my hands for so long, and work has had me very busy lately, I haven't really worked on the car in months. This fact left me with quite an itch to scratch. Since the cage needed paint before anything else could happen to the car, this project was a no-brainer.
My first decision was color. I decided to stay with gloss black for now. I considered going to something like white or gray, but any major color change like that was going to require a repaint of the entire interior. Staying with black will allow me to get the job done much quicker and move my time and attention to more important aspects of getting the car ready.
My second decision was paint type. I chose Rustoleum Oil-Based Enamel. I've used this paint before and have been happy with its results and strength. It is also readily available at most hardware stores. This will make touchups very easy.
Finally, an application process had to be chosen. There are three main types here: brush/roller, rattle can, and spray gun. I settled on the brush/roller method because of its ease of use. Since both other methods produce plenty of clouding and overspray, extensive masking would have to be done and serious air handling issues would have to be dealt with. Manual application allows for a much cleaner process and hopefully a result that is just as good. Also, at less than $9/quart, the price is very attractive.
I spent a couple hours last night weaved in and around the cage painting all of the welded nodes and hard to reach places. With a little luck I should be able to finish the rest of the first coat on the cage tonight.

Tuesday, September 28, 2010
Tuesday, September 14, 2010
Homecoming
The cage is complete and the car is back in my shop!
I picked the car up from Competition Cages this past Saturday and could not be more pleased. I had seen Chris's work in the past and knew that he did great work, but there is something even better about it when you are the customer rather than just a casual observer. I have to remind myself that it is actually my car when I look at it now.
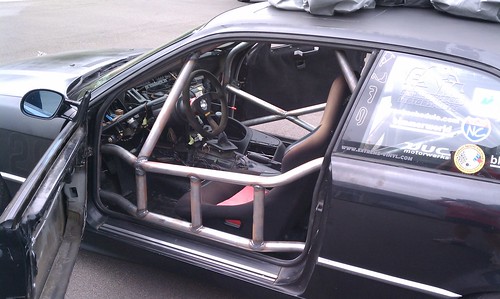
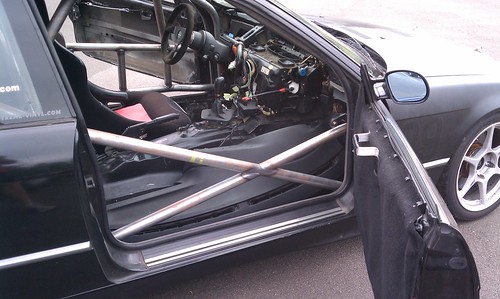
The cage is a "typical" 6 point cage; two mounting points in the footwells, two behind the front seats, and two at the rear of the passenger compartment. We made some additions to improve strength and functionality as well. The main hoop is fairly normal with a single diagonal bar and harness bars inside it. Moving forward from the main hoop we decided to use A-pillar hoops on each side and connect them together with a bar across the top of the windshield and another bar on a diagonal from the main hoop on the driver's side to the A-pillar hoop at the windshield on the passenger's side. Foot protection bars and plates were added in each footwell.
As you will see, we decided on NASCAR-style door bars for the driver's side. This allowed us to gut the driver's door and push the bars out, creating more space around the driver's seat. Additionally, it gave us a place to anchor the vertical support bar coming down from the top of the A-pillar bar. A standard X-bar was used at the passenger's door opening.
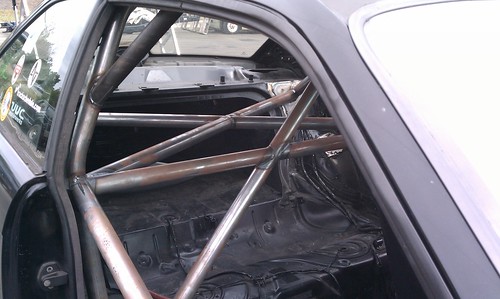
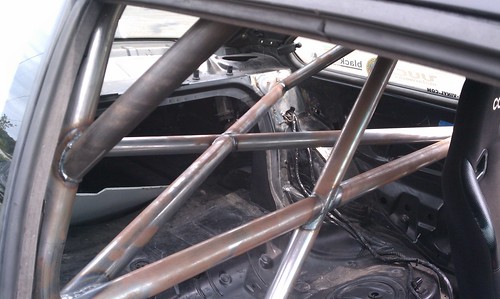
In the rear we decided to run the rear downtubes to large mounting plates on the rear bulkhead. This area is much stiffer than the area of the wheel wells the old cage was connected to and should provide an nice increase in overall chassis stiffness and safety. From there we added something a little unconventional in the sports car cage world...a horizontal X connecting the downtube bases to the main hoop at the same node as the harness bar and door bars. A couple extra support bars above the seats and the cage was complete.
I think everything came out great. Chris executed the designs we discussed perfectly. The cage should make the car better dynamically and will certainly be safer. Hopefully I never get to find out how much safer it is. While the cage is certainly a very important part of a race car build, it is one you never want to use.
On to the pictures:
Driver's side NASCAR-style door bars
Passenger side X bar
A look inside
Another interior shot showing structure and horizontal X
Mmmm...pretty welds
Saturday, September 11, 2010
Finally
Picking the car up from Competition Cages today. I'm so excited I can't stand it. An update with new cage photos will follow shortly.
Subscribe to:
Comments (Atom)
